Advanced Search

Search Results (Searched for: cast iron welding)

28 Aug 2015 21:38

Brazing D2 radiator bottom tank

Category: DISCUSSION

Neil,

I have been researching cast iron welding so I can weld with gas (or braze, silver solder?) my exhaust manifold on my TWENTY. I have spent some quality time viewing YOUTUBE with guys welding cast iron with gas, MIG and stick welding with CI specific rods. If I understand your problem, part of the hole (has split away from the rest so you can see the threads in there?) I would try this. Clean all surfaces with a wire wheel. Try to vee out where the weld will be made but leave a small section where the bolt will screw into the broken part un-veed so that the part goes back exactly where the threads are. I have no idea how much area you have to work with so maybe that is poor advice. It saves drilling it out and re-taping. You still would need to run your tap into the brazed area if the braze runs into the hole that far.

I think the pre-heating and post welding cool off in the grill is a good idea. If you stick weld you can peen it with a small hammer after you weld a bit to get rid of the stress. If you braze it, I'm not sure the stress builds up as bad so peening maybe not necessary especially if you cool it in the grill. (Bye the way, I like grilled D2 bottom tanks best when eaten with Dijon Mustard!)

Sorry, I'm no expert on this and still learning. Another option would be to take it to a professional welding shop and let them have a go of it.

Good luck with it and let us know how it came out. That's my 1.25 cents.

Jan
10 Aug 2015 18:04
Replied by Jack on topic Rusted / broken bolt removal

Rusted / broken bolt removal

Category: DISCUSSION

I feel compelled to answer this, but first I'm going to admit that i've seldom found the silver bullet that shoots them out easy.

But note one thing: Heating cast iron is a dicey practice. It can break as noted from uneven expansion. Also, quenching hot cast with water will produce chilled cast which is more brittle than glass and as hard as a diamond. If you chill the cast iron, no ordinary tap is going to clean up the threads.

The best penetrant by far that I have found is 50/50% ATF and acetone. Mix it as you use it. It has a pot life of a few minutes. Oil and lightly hammer, oil and lightly hammer, oil and lightly hammer, etc. Allow for tedium.

If I am going to weld onto a stub, I bore a hole in a piece of scrap steel, 1/8" or thicker depending on size. Washers too often have a sloppy fit and are too thin. And often are pretty cheap steel. An arc welder, in welding onto the stub, will heat that stub much hotter, much more precisely on center, and much faster. The thread corrosion will somewhat insulate the casting from the intense heat for a few seconds, but that's all you need. You can quench the area with cold water before enough heat has traveled to the cast to hurt it.

If it can be done, heat to bright red and quench for a quick release. In that cast iron, I'd say it had better not be done. Save that for steel on steel. In a case involving truck suspension U-bolts or such, throw away the nuts and get new ones after using that much heat. You can't guarantee the heat treating after heating that hot.

Others have offered a lot of ideas here, all good ones. Just keep trying them until one works. None of them is likely to work best all of the time. And maintain a high level of patience and if it's hot out, a full beer cooler. You might be a while.
08 Aug 2015 23:33

Rusted / broken bolt removal

Category: DISCUSSION

I'm sure this has come up before, any ideas on how to remove
rusted / and broken bolts ( not studs ) out of a cast iron cylinder
block ? after removing the valves / pistons I'm considering heating
the bolts , one at a time to a light orange color then letting cool
for about ten seconds more or less , carefully work it back and forth
with a vice grips to loosen . I don't have a welder so welding a hex
nut isn't a option , and I never have had any luck with drilling /
easy out , that always seems to turn into a disaster...
I realize this is not Cat related , but I thought I'd run it by you guys
anyway
Thanks for looking , Kris
05 Jun 2015 12:49

advise needed : D8800 cylinder head cracks

Category: DISCUSSION

OK! now my valve grinding man said that one head has been welded and one is cracked from starting inside a port and running through a seat. Casting # is 2F5317
Has anyone here welded, or had a cast iron head welded? how much did it cost? & how well did it work? any tips or tricks? I was thinking of a good pre-heating & welding with Inconel, a high nickel iron alloy (that I have on hand). Or do I just need to get a better head & save the bad one for a later day.
31 Mar 2015 19:08
Replied by cab on topic D7 47A vibration

D7 47A vibration

Category: DISCUSSION

I found a good used shaft and good used gear, am replacing thrust washer at front gear, both bushings shaft rides in, and all keys and locks. Will have to have hub pressed off bad shaft and onto new shaft to a very exact 20.xxx" from threaded end. The book gives an early and late spec and isn't real clear on serial # break so I will measure the current distance and match it with one of the book's two specs unless OM jumps in with a hail mary. (Serial 47A 1554)

OM - I mentioned a few posts back that the spring/spacer pack was complete but in the wrong order. Maybe that hastened the key failure? They look to be in fine condition. The spacers are discontinued but the springs are out there. I am okay with current ones but will replace if that is your suggestion.

The Holt large bore engine facility offered to weld the cast iron gear to the hardened shaft after replacing key by torquing nut, removing, then welding gear/shaft mating surface. I briefly considered it and passed for several reasons.

As to Garlic's question, which is also at the top of my list, why did this happen? I do not believe foreign matter wedging in the gears caused this. The gear was not spinning on shaft constantly because I never had weak oil pressure.

My opinion is that the keyway or key became weak or damaged some time a long time ago. After placing machine back in service and running hard for 60 hours, the key failed allowing the gear to move on the shaft. A bit of key or metal stopped the turning and it remained out of time but stayed in the same place. Maybe it turned a little every now and then but not for long before it "caught" again. Thus the constantly good oil pressure.

I plan on pulling the weights and inspecting bushings in them since the shaft bushings showed a good bit of wear. That's all I got for now.
09 Feb 2015 23:04
Replied by Jack on topic pre compression chambers D7 3T

pre compression chambers D7 3T

Category: DISCUSSION

My 3T came with both heads welded, and they didn't last. They had been cracked through the seats like yours. Since the manifolds still lined up, I'm pretty sure they got on-farm welded rather than in a furnace and done properly. So I tore down my old parts Cat and found two more broken heads. So now I have two cracked heads, big valve type and two of the small-valve type, nothing that will run.

I sent off my original heads to be welded properly and they did a good job of welding. However, a head of that size will move around quite a bit. They shaved the block side and the manifold side, but the water manifold no longer fit up properly. I managed to shift one head around a little and got the water manifold up to fit, but now it blows some smoke out of #4 port.

But I'm not done. It started leaking water into the exhaust at #3. When I started looking into it, I found the iron sweating water into the port--porous casting. Quite a lot of water. i could run it but I needed to drain it when out of use for more than a night.

So my friends in the business found me an used head at next town up the river--a virgin! never been cracked, good seats, the works. I replaced the back head, but now the water pipe fit worse than it did with two welded heads!

I made it work, but my intake and exhaust manifolds don't fit as well as I would like.

Just a little bed time reading to let you know what you can look forward to if everything goes cockeyed. Just want to be helpful in the event that you also were not wanting to sleep at night!

I don't know your area. It's probably picked over long since for good used parts, but I'd sure try to find two good matched heads, both big valve ones.

Good luck. Hang in there. It can be fixed!

Jack
01 Aug 2013 11:37
Replied by GoCat on topic 4" or 5" exhaust ?

4" or 5" exhaust ?

Category: DISCUSSION

I would go with the 4",its only got to be expanded 1/8" for it to fit,a clamp to secure it is the way to go.if my memory is correct the turbo elbow is a cast iron,welding an exhaust stack on does not make it easy if the hood has to come off.
GC :thumb:
23 Jul 2013 06:01
Replied by drujinin on topic water jacket on 2 Ton

water jacket on 2 Ton

Category: DISCUSSION

Pay for metal stitching. Let a knowledgable repair tech fix it.
Castalloy is a welding rod(without GOOGLING).
You are right about welding Cast Iron, some advise is good, some isn't good. Scattered across the US are a number of talented Welders who specailize in Cast Iron engine repairs.
As far as Epoxy Patches, yes there are many fine materials available today that will work in the case of an external crack on a block. Grind it DEEP! Do not scrimp on the grind as you want virgin iron and depth of material to bond with.
Good Luck on your Decision!
16 Jun 2013 10:53
Replied by Garlic Pete on topic Father's Day

Father's Day

Category: DISCUSSION

Thank you for posting your story and pictures, Sawatzky1. The above discussion got me thinking about my Dad.

My Dad was an accountant, like me. My Dad and my Uncle grew up working in a shop with my Grandfather and his brothers. They ran an automotive and machine shop which mostly supported the farmers around the Sacramento area. They custom designed and machined planting and harvesting equipment for those growers and also made a line of commercial production equipment, including custom hay dump rakes and other stuff like that.

My Dad and my Uncle learned a lot growing up in that shop. My Grandfather and Great Uncles had to work hard to make a living, and their kids, my Dad and Uncle included, worked hard, too. From the time they were very small, my Dad and Uncle worked in the shop. They were paid according to the flat rate manual, so if they worked hard and fast, they made good money. If they dawdled, or didn't work hard, they didn't make much money for the hours they spent there. The shop was a very fun place to work with lots of shenanigans, jokes and interesting things happening. It was hard work, though.

Both my Dad and Uncle learned a lot growing up in that environment. Both of them went on to get college degrees, my Dad in accounting and my Uncle in environmental management. My Dad and Uncle both appreciated what they learned from the way they grew up, and they passed that knowledge along to me.

For my Dad, working on equipment was something you had to do to maintain your tools. He didn't particularly enjoy doing it, because during the first part of his life he had to do it to make money, to support himself and to provide for himself and my Mom. One of the reasons he became and accountant was that he felt he could create better economic opportunities for our family through that path. He also thought that path offered an opportunity to work in nicer environments and at better hours. He could easily have moved on from the shop, worked in a nice comfortable office for the rest of his life and never looked back.

Instead, when I was born and the opportunity to go to live and work on a successful farm for a very successful farming family came up, he chose that path because he felt it would be the best environment for my Mom and me, and my Sister when she came along. This allowed us to live in the country. It also allowed us to spend most of each day hanging around the office, learning what he did and how he did it, and hanging around the shop at the farm, seeing how equipment works and how to keep it working.

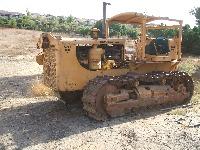
Our house was in the middle of a walnut orchard and about every month or so, they would bring a TD9 and disc over with the big lowbed. Dad would start up the tractor, put me on the seat and we would disc the twenty or so acre orchard together. Sometimes when Dad was busy, he would start the tractor and leave it idling so that Mom and I could disc the orchard.

My Mom taught both my Sister and I to read while we were in pre-school. After I turned four, my Dad decided that it was time for me to start to learn how the tractors and trucks that I liked so much work. He told me that when he was my age, his Dad helped him build a go-cart and he always had one after that. He said if I wanted to, he and I could build one, too. I was all for that.

He checked around and found a Heath Kit Super Trike. This was a kit produced back in the Midwest. They welded up two subframes and provided all the components, which you had to assemble. One subframe carried the rear axle and power unit with a ten horsepower Briggs and Stratton engine connected by a belt and centrifugal clutch to a forward reverse transmission, which was connected to a chain to a differential on the axle. This power frame was connected by a big hinge and two coil-over shocks to the front frame, which carried a bucket seat with handlebars and a single front wheel. It all ran on balloon ATV tires.

When the kit arrived, Dad took me down to the shop and we spent every evening down there for several hours over the course of a few months. He brought in all the boxes, helped me open them and get out the instructions and said, "Start reading and figure out how to put this thing together." It must have been very frustrating for him to sit quietly by and watch as his four year old tried to figure out this thing, turned the bolts backwards, struggled and asked questions over and over. He answered every question and provided help, but he waited until I figured out I had a question before volunteering. He often would give me an overview or explanation of what we were trying to accomplish before each major task, but left it up to me to figure it out.

I know that it must have driven him nuts to do this. He was tired at the end of a long day at work and surely would have preferred to have been home on the couch watching TV. I have treasured what I got from this experience for the rest of my life, though. Not only did we have the experience together, but I learned that I could approach a seeming insurmountable, impossible task, organize it, understand it piece by piece and accomplish it by just taking it one piece at a time.

After we got the rear power subassembly put together and I was a little over 50% at turning bolts the right direction, Dad said I had a decision to make. We could just put the front assembly together and I'd have a really neat, one seat tricycle go cart or, we could abandon the tricycle and fabricate a conventional front axle with steering wheel. This would be more stable and would provide room for a bigger seat so two people could ride. It would also involve learning to weld, fabricate and lay out a design. Of course, I went for the four wheel, two person setup.

We cut the hinge off the front subassembly and Dad and a couple of the machinists set about explaining to me how a steering system works, suggested how to lay out and fabricate one, and allowed me to experiment with their guidance through about four different iterations until we got the front axle right. Along the way over the next couple of months I learned about camber, caster and toe in, what they all did and how they affected performance. I also learned how to work a lathe, how to cut with a torch and how to stick weld. I think it took a couple of weeks of welding before the two pieces actually stuck together after I welded them.

In the end, I had a go cart which could carry two people, tow a small box trailer and would do about 45 MPH. I had also learned how all of the mechanical systems of a simple vehicle work, learned how to plan and manage a complex project, how to accept guidance and suggestions gracefully, how to recognize when what I thought was a good idea really wasn't and many other life lessons. I also had six months of work together with my Dad, learning from him and developing respect for him in new areas which I wouldn't have gotten any other way.

I have tried to carry those lessons learned at four and five years old through the rest of my life. I have also tried to create similar experiences for my wife and my two daughters. In many ways, this bulletin board and many of the activities I do with the Club have helped to create similar experiences for me. I appreciate that on this Father's Day morning.

Thank you to those who posted on this thread and prompted me to get out these old memories, and to those of you who have read them.

Pete.
08 May 2013 22:34

Help, need a pony motor for d2 3J.

Category: FOR SALE/WANTED

Welding even with a cast iron rod is tough on old castings. I've done a "stitch repair" with success. Drill, tap and screw in a repair plug with sealer on it, the next one catches 1/3 of the dia. of the previous plug and so on. Time consuming but a successful job. Old cast has so many impurities in the metal it's hard to run a good bead, then there is the heat issue. When using a sealer in the coolant, I use nothing but Bars Leak, it won't plug anything else other than the leak. Good luck.
12 Feb 2013 17:57

D8 2U roller and sprocket weld-up repair mig wire suggestions

Category: DISCUSSION

Well done ! Wire feed cuts the time more than half . Looks to me 55 is harder than 33 .
Only draw back I see is its only recomended for 3 layers without some heating.

Much as your laying down with each pass 3 ought to be plenty.
Was it much trouble to cut out distortion?


Thanks, once I started welding the interpass temperature was maintained between 350 and 450 till it was complete, just had to pause about 5 min between beads. Gives you time to clean for the next pass.

I cut the shrinkage out with a Bridgeport, there's what looks like a cast-iron liner in the roller and it cuts easy, two passes and it was done.

I don't see any cracks or checks but I'll have to run them on the tractor before I know for sure I guess.... Hoping for the best!

Just got some used tracks in yesterday from General Gear and they look great. They were advertised as 4 5/8" tall but they measure 4 3/4" with my ruler so I'm pretty happy.
27 Jan 2013 20:49
Replied by Larry on topic Water pump blues

Water pump blues

Category: DISCUSSION

d9gdon, I'm not familiar with Airgas rod, that product sounds like regular brazing rod. I used Certanium, the number I don't have handy at the moment. This rod has the pink flux on it and it was a pleasure to use. I did not have any trouble welding up the cast iron impeller and after chucking it up in a 3 jaw chuck, I found it machined quite well but it is tougher than regular bronze rod. It has a slightly whitish yellow when machined. The big thing I found was using enough heat to make the rod flow and bond with the cast iron impeller. Thee was no warping of the impeller either. I had purchased a pre 1950 D315 power unit years ago and it had the brass impeller in it. The motor had been in a drag line and was somewhat neglected but I did a complete rebuild on it. As the old impeller was slightly damaged (not leaking yet) I elected to replace it. The replacement was a cast iron impeller with the ceramic washer. Naturally, it failed before it was put into service. I welded up the impeller and that was the end of the problem, I have since done several for D311's D315's. and D318's with no recurring problems. The price Cat wanted for these impellers was more than my cusomers and I wanted to pay. Piss me off and I find a solution. Cheers, Larry. I only have one impeller left and I am going to keep it. It is a brass one but it needs to be welded up in the seal run area and be remachined. I think our colder climate was the reason for the glue joint failure as there is more of a temperature swing up here in the Cdn north.
25 Jan 2013 22:59
Replied by ccjersey on topic Water pump blues

Water pump blues

Category: DISCUSSION

How many hours do you forsee it running? If many hours, I would purchase a new impeller because of the welding and lack of the ceramic seat.

I believe the washer that is part of the seal assy is the carbon, not referring to the ceramic one. There must have been some procedure to glue the replacement carbon washer to the rubber bellows, but have never heard it mentioned.

I recently put a couple of D318 water pump seals back together with some really good pliable 2 part adhesive made for gluing plate cooler gaskets to the plates. It is resistant to cleaning chemicals and hot water, so should be fine. The rubber bellows had pulled loose from the brass cup and the carbon ring was separated, I cleaned all the surfaces, applied a coat of adhesive and then pressed the parts together and bent the retaining tabs on the brass cup to hold it all in compression. Haven't used them yet, but they look like they should do the trick.

One if my impellers had the ceramic washer come loose, so I used JB weld to reattach it. I would measure and see if you can accomodate the ceramic washer (if you have it) without over crushing the seal bellows. I believe the impeller should be about 50 thousandths or less from the housing for best performance, closer the better without hitting in my opinion.

I replaced the seal on our D333 engine in the grader after we overhauled it and found the same as you, no washer on the impeller. Faced it in a drill press until it was polished and installed it. It's doing fine, but grader doesn't get a lot of hours. I believe the first cast iron ones must have been made without the washers until they realized how soft they were and how rapidly the carbon wore into the relatively soft cast they use. Or maybe folks have just been throwing the detached ceramic away and reinstalling the impeller just to get by.

You can also purchase a seal from industrial supply which comes with a ceramic washer that has a gasket in the center and on the back of it to seal it to the impeller. It can be hard to get it slid down the shaft enough to get the impeller started behind it to push it home, but still do-able!
20 Jan 2013 19:36
Replied by Inter674 on topic D69U Direct Electric Start

D69U Direct Electric Start

Category: DISCUSSION

agree with all the above, and pre-heating will also assist and should prevent cracking. There used to be a rod called cast craft that was specifically made for welding cast iron/steel. My D4 7U originally had large welding around the rear bull drive housings and right across the back end.

I replaced the whole transmission but in doing so noticed that the welds - which must have been done professionally - were V'd almost right through the casting, and some weld had a bluish tinge indicating perhaps cobalt rods had been used.

I spoke with an old supervisor for a Cat dealership in Tasmania and he said at one time back in the 50 and 60s, they had 10-15 welders on staff and repaired many transmissions and other castings. I guess they got very good at it. He said pre-prep was vital. They would strip the whole unit down, clean it, deep v the welding area, pre-heat, weld short sections and cool under control, eg., in sand or use a rosebud flame progressively withdrawing the heat. They also applied patches in high stress areas and in other areas they used a technique that essentially consisted of layered weld beads back and forth cross the crack and along its entire length. This messy looking weld was left as is and provided additional strength to the repair.

In the end as the machines got older and less valuable, it was not economical to weld them at the dealership, and as Cat progressively addressed structural weaknesses for example, by beefing up castings, the need for such repairs fell away.

I have also seen home-made repairs probably just welded with a low hydrogen rod without pre-heat and controlled cooling. These seldom work out on large castings as evidenced by one of my spare tranny casings which has simply cracked along the weld where the weld material meets the cast metal - probably due to shrinkage.

I would not attempt a large cast weld myself, but if the crack is small and not in a vital area, why not have a go as described above, and see what happens.
20 Jan 2013 18:38
Replied by ccjersey on topic D69U Direct Electric Start

D69U Direct Electric Start

Category: DISCUSSION

I've been watching this thread with anticipation of doing my own 9u direct electric conversion. Great info here. I have started to accumulate some of these same parts as well.

My bell housing has a crack that needs repaired. Is it cast iron, cast steel, or what? What welding process would you use? It has been repaired while still in the machine, and now that it is disassembled, I would like to get it welded a little better. I have a hobart 187 mig welder or an old lincoln buzz box. Thanks.


Joel, I wish you were closer, I have a several oil clutch bell housings sitting out back. I am guessing you will find the housing is cast iron construction. Unless you think you can just use an epoxy to stop a leaking non structural crack, I see two ways of repair. Welding after a good preparation of the casting or Lock n Stitch where you drill, tap and fill a series of holes with threaded plugs.

For welding, usually try veeing out the crack a little if in areas which can stand some bead protruding above the surface or deeply vee-ed out if the surface must be ground flush. I believe you should also grind the surface where the weld will run so you don't have any impurities picked up in your puddle. Most folks use nickel rod with extensive preheat before welding or else only short beads run between cooling periods so you can put your bare hand on it before welding again. It is usually suggested to peen the weld as it cools. Since you have to wait anyway, might as well peen it. :lol:

I have a D25J which has an extensive repair to the transmission/bevel gear housing done with nickel rod. It was done long before I got the project tractor and seems to have held just fine.

I have done a repair on cast exhaust manifold with a mig using regular mild steel solid wire and 15%Argon/85%CO2 shielding gas. It wasn't pretty, looked like bird do, but it stopped the smoke. I was amazed that I could build layers to replace missing chunks of the manifold and even welded on a piece of schedule 40 pipe in one place which was missing a very large chunk. I figured I had nothing to loose by trying and was pleasantly surprised at the success of the repair.

Other times I have tried using 7018 stick or ER70S wire, the repair cracked as it cooled, so at this point I don't know how to predict what will work and what won't! Seems as though different castings from different manufacturers weld completely differently. Shape of the piece and location of the crack also seem to be important.
Displaying 46 - 60 out of 106 results.
Time to create page: 4.805 seconds
Go to top