- Posts: 181
- Thank you received: 181

ACMOC Membership Benefits
- FREE quarterly magazine filled with content about antique Caterpillar machines
- FREE classified listings
- ACMOC store discounts and specials
- Full Bulletin Board Access
- Marketplace (For Sale/Wanted)
- Technical Library
- Post attachments
$44 /year ELECTRONIC
$60 /year USA
$77 /year International
- Forum
- Antique Caterpillar Machinery Owners Club
- DISCUSSION
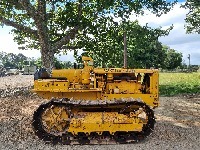
- Found a one owner 1950 D2 5U with 3940 original hours
Found a one owner 1950 D2 5U with 3940 original hours
2 years 7 months ago - 2 years 7 months ago #231314
by Markds3
Replied by Markds3 on topic Found a one owner 1950 D2 5U with 3940 original hours
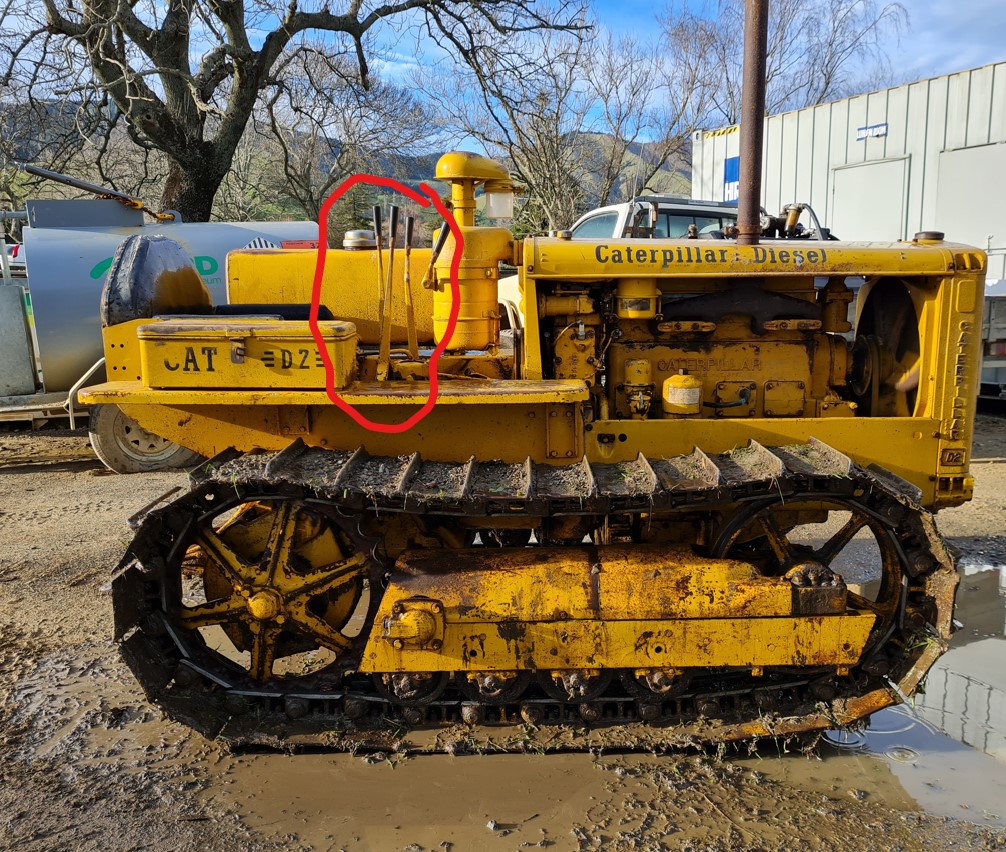
Now a question for the experts, with the steering clutches adjusted correctly (at least 3 Inches movement forward at the top of the levers from their resting position - as per the maintenance instructions, see below) why are the levers sitting unevenly like pictured below? Is it because the steering clutches have worn unevenly from one side of the tractor to the other? I did notice the LHS clutch adjustment screw was a little bit further through the clamp bolt compared to the right. and what do I need to do to correct it, do I adjust the RHS clutch so it has more forward movement so they both sit level at rest?

Attachments:
Last edit: 2 years 7 months ago by Markds3.
Please Log in or Create an account to join the conversation.
- Mike Meyer
-

- Offline
- Platinum Boarder
- Member
Less
More
- Posts: 3293
- Thank you received: 197
2 years 7 months ago #231315
by Mike Meyer
Replied by Mike Meyer on topic Found a one owner 1950 D2 5U with 3940 original hours
I think there are rubber stops that set the forward travel of the steering clutch levers, you might be missing one on that side? Check out the brilliant D2 repair video's that "Sasquatch" has shared on youtube, I think there are links to them through this board, I'm sure he will have discussed them in one of his video's.
The following user(s) said Thank You: Markds3
Please Log in or Create an account to join the conversation.
2 years 7 months ago - 2 years 7 months ago #231316
by Markds3
Thanks Mike, I can't see any rubber 'stops' in any of my parts lists and I assure you I have spent several hours watching and rewatching Toby's videos, unfortunately, he hasn't got up to the stage where he does the final adjustment on the steering clutches as he hasn't assembled the tractor completely yet. Maybe Toby could chip in here? @Sasquatch (I don't know if this will work, tagging members like this works on other forums I'm on

Replied by Markds3 on topic Found a one owner 1950 D2 5U with 3940 original hours
I think there are rubber stops that set the forward travel of the steering clutch levers, you might be missing one on that side? Check out the brilliant D2 repair video's that "Sasquatch" has shared on youtube, I think there are links to them through this board, I'm sure he will have discussed them in one of his video's.
Thanks Mike, I can't see any rubber 'stops' in any of my parts lists and I assure you I have spent several hours watching and rewatching Toby's videos, unfortunately, he hasn't got up to the stage where he does the final adjustment on the steering clutches as he hasn't assembled the tractor completely yet. Maybe Toby could chip in here? @Sasquatch (I don't know if this will work, tagging members like this works on other forums I'm on
Last edit: 2 years 7 months ago by Markds3.
Please Log in or Create an account to join the conversation.

2 years 7 months ago #231348
by Sasquatch
Replied by Sasquatch on topic Found a one owner 1950 D2 5U with 3940 original hours
To adjust the positions of the steering levers you turn the acorn nuts that are on the other ends of the actuators in that compartment. You’ll have to remove the cotter pin first, but as you turn the acorn nut in the steering lever will travel forward. Turn the acorn nut out and the steering lever will travel back. 👍
The following user(s) said Thank You: Markds3, Shaban1983
Please Log in or Create an account to join the conversation.
2 years 7 months ago #231349
by Markds3
Replied by Markds3 on topic Found a one owner 1950 D2 5U with 3940 original hours
Thanks very much, Toby, I've had a look at the parts list and can see exactly what you mean. One more question, are the levers meant to be sitting vertical when at rest?To adjust the positions of the steering levers you turn the acorn nuts that are on the other ends of the actuators in that compartment. You’ll have to remove the cotter pin first, but as you turn the acorn nut in the steering lever will travel forward. Turn the acorn nut out and the steering lever will travel back. 👍
Please Log in or Create an account to join the conversation.
2 years 7 months ago - 2 years 7 months ago #231350
by Markds3
Replied by Markds3 on topic Found a one owner 1950 D2 5U with 3940 original hours
Very much looking forward to your series on the 5J1113 continuing! I've just picked up a spare starting engine, and I am very keen to see yours going back together!
Last edit: 2 years 7 months ago by Markds3.
Please Log in or Create an account to join the conversation.
2 years 7 months ago #231354
by neil
Cheers,
Neil
Pittsford, NY
Replied by neil on topic Found a one owner 1950 D2 5U with 3940 original hours
Hi Mark, are you planning to refurbish that spare starting engine? If so, one thing I did that you might be interested in is fitting crank thrust washers. The stock implementation relies on the main bearings being set in place to control axial float (015 or whatever it is). It's not a robust solution because the amount of surface area on the ends of the bearings is pretty small, but mostly because the main bearings are located axially by small dowels, which are meant to be a press-fit into the bearings. These dowels serve dual duty as oil supply conduits to the bearings. Another fellow on here turned down the rear inner surface of the block, the inner surface of the flywheel-end cover, and the crank cheeks, in order to fit 1/8 to 1/4 thick oilite thrust washers, sized to maintain the 015 float. The OEM bearings were then moved a little outboard (possibly shortened a tad) so that there was no possibility of contact axially. This removed the pounding input from the crank, even when not running but the tractor is clunking around in teh field, that is thought to be the primary reason for loss of tightness in the dowels.
I did the same to my pony, and am very happy with the results. It wasn't hard for the machine shop to do, once I told them of the importance of centering the crank axially, then taking an equivalent amount of material off each end surface so that the washers could be roughly the same thickness.
Of course, none of this is necessary but it's a nice upgrade to improve the longevity of the bearing system. The bearings and thrust washers can be made out of aluminum, or oilite or similar material. New dowels are important.
Cheers,
Neil
Pittsford, NY
The following user(s) said Thank You: Markds3
Please Log in or Create an account to join the conversation.
2 years 7 months ago #231365
by Markds3
Replied by Markds3 on topic Found a one owner 1950 D2 5U with 3940 original hours
Thanks, Neil, appreciate your detailed responses as always. Apparently, the engine is a good runner (although the previous owner took the magneto off for a spare to his own D2) and as I only paid $300NZD (Approx $215USD) for it I thought it would be a good way of securing spares for what seems to be the highest wear and most troublesome area on these tractors. I haven't made a decision yet if I will recondition it, as I haven't got it here yet (it's sitting at my FIL's house in Levin) and I haven't assessed it's condition. And as you say, I am well aware of the issues with the little dowel coming loose, the casting around the rear bearing cracking and the problems around crankshaft end float and I'm eagerly awaiting to see what Toby does to remedy this on his engines (He's mentioned several times he has a plan).Hi Mark, are you planning to refurbish that spare starting engine? If so, one thing I did that you might be interested in is fitting crank thrust washers. The stock implementation relies on the main bearings being set in place to control axial float (015 or whatever it is). It's not a robust solution because the amount of surface area on the ends of the bearings is pretty small, but mostly because the main bearings are located axially by small dowels, which are meant to be a press-fit into the bearings. These dowels serve dual duty as oil supply conduits to the bearings. Another fellow on here turned down the rear inner surface of the block, the inner surface of the flywheel-end cover, and the crank cheeks, in order to fit 1/8 to 1/4 thick oilite thrust washers, sized to maintain the 015 float. The OEM bearings were then moved a little outboard (possibly shortened a tad) so that there was no possibility of contact axially. This removed the pounding input from the crank, even when not running but the tractor is clunking around in teh field, that is thought to be the primary reason for loss of tightness in the dowels.
I did the same to my pony, and am very happy with the results. It wasn't hard for the machine shop to do, once I told them of the importance of centering the crank axially, then taking an equivalent amount of material off each end surface so that the washers could be roughly the same thickness.
Of course, none of this is necessary but it's a nice upgrade to improve the longevity of the bearing system. The bearings and thrust washers can be made out of aluminum, or oilite or similar material. New dowels are important.
Please Log in or Create an account to join the conversation.
2 years 7 months ago #231368
by neil
Cheers,
Neil
Pittsford, NY
Replied by neil on topic Found a one owner 1950 D2 5U with 3940 original hours
Ok sounds good. Would you have the serial # for the pony's previous owner's D2? I'm always on the lookout for my grandfather's D2 which was something like 5U14518 although I'm sure it headed to China decades ago
Cheers,
Neil
Pittsford, NY
The following user(s) said Thank You: Markds3
Please Log in or Create an account to join the conversation.
2 years 7 months ago #231384
by Markds3
Replied by Markds3 on topic Found a one owner 1950 D2 5U with 3940 original hours
I contacted the old owner yesterday (he's in Whanganui) and he tells me that his D2 is 5U8071 and has the large front idlers, a Birtley blade and a rear tank.Ok sounds good. Would you have the serial # for the pony's previous owner's D2? I'm always on the lookout for my grandfather's D2 which was something like 5U14518 although I'm sure it headed to China decades ago
Please Log in or Create an account to join the conversation.
- Forum
- Antique Caterpillar Machinery Owners Club
- DISCUSSION
- Found a one owner 1950 D2 5U with 3940 original hours
Time to create page: 0.434 seconds
ACMOC
Antique Caterpillar Machinery Owners Club
1115 Madison St NE # 1117
Salem, OR 97301
cat@acmoc.org
Become a Member!
"I became a member recently because the wealth of knowledge here is priceless."
- Chris R
"I also joined a year ago. had been on here a couple of times as a non-member and found the info very helpful so I got a one year subscription (not very expensive at all) to try it out. I really like all the resources on here so I just got a three year. I think its a very small price for what you can get out of this site."
- Jason N